Building an Arm based Amarisoft Base station version 2026-04-02*This document is based on the latest test release.
Features may not be present in your current installed software. You may check their availability in your release documentation.
If you require an up to date release, ask for it in a ticket.
Features may not be present in your current installed software. You may check their availability in your release documentation.
If you require an up to date release, ask for it in a ticket.
Table of Contents
1 Introduction
Arm processors are designed to minimize power consumption. Thanks to their low cost, low energy consumption and low heat generation, they are ideal for light, portable and battery-powered systems such as small cells.
This application note describes all you need to build your own Arm based Amarisoft base station. It explains the hardware requirements as well as the software install procedure.
2 Hardware Requirements
- - an Arm platform.
In this application note we use the SolidRun Honeycomb board based on NXP LX2160A multicore Arm processor with 16x Arm Cortex A72 processor.
https://www.solid-run.com/wp-content/uploads/2023/01/HoneyComb-LX2-Datasheet-2023.pdf. - - Accessories for Arm Platform.
The required accessories for Honeycomb platform are:- - 32 GB of RAM such as Kingston HyperX 32GB SO-DIMM DDR4 (2x16GB).
- - 16 GB Micro SD
- - Micro USB to USB cable
- - Power supply. Honeycomb board can use any ATX standard 150W+ power supply. For a small form factor, a Pico PSU 5A 12V ATX power supply can be used.
- - Radio frontend.
In this application note, we use the AMARI PCIe SDR100 card. - - Antennas. 5G antennas for over the air testing if needed.
- - A Linux machine for the board bringup.
3 Install Guide
3.1 Honeycomb Board Bring-up
A complete step by step start guide is provided by Solidrun at
https://solidrun.atlassian.net/wiki/spaces/developer/pages/197494288/HoneyComb+LX2+ClearFog+CX+LX2+Quick+Start+Guide.
Please follow this guide until the end of the section Final Stages.
Some clarifications are:
- - The image name should match the speed of your DDR. The 3200 in the image name refers to 3200 DDR speed. Images with xspi or clearfrog prefixes should not be used. The image
lx2160acex7_2000_700_3200_8_5_2-3fbd680.img.xzhas been tested in our end. - -
tiohas been used as a serial device tool to connect to the Honeycomb board.tiocan be installed on a Linux machine by typing
dnf install tio
in Fedora systems. - - The idea is to flash the image into the embedded memory eMMC so that the board can boot directly from it. After resizing the eMMC, the boot switches should be changed to boot directly from eMMC. A complete power cycle would allow to verify if the boot from eMMC works as expected.
3.2 Software Install
The default OS used in the image is Ubuntu. The following steps are needed before installing Amarisoft software release.
- - install the following packages.
apt-get install nano wget screen php php-json libapache2-mod-php lksctp-tools iperf
- - Allow root login with remote access.
nano /etc/ssh/sshd_config (Set PermitRootLogin yes)
service sshd restart
- - configure the network interface. Each time the board is power cycled, the command
dhclientshould be used to configure the network interface and to acquire an IP address from a DHCP server. This step can be automatized by creating a script which is run at boot time as follows:- create a script under root directory.
nano /root/nw.sh - Add the follwoing line in the script and save it.
dhclient
In case a fixed IP address is required,dhclientshould be replaced by these commands.
ifconfig eth0 up
ifconfig eth0 <IP addr> - change the permissions so that the script can be executed.
chmod 755 nw.sh - Add a network service that executes this script at each boot. Create file nw.service under
/lib/systemd/system/with the follwoing content.# Copyright (C) 2012-2026 Amarisoft # Network systemd script version 2024-06-15 [Unit] Description=Start Network service [Service] Type=oneshot ExecStart=/root/nw.sh RemainAfterExit=yes [Install] WantedBy=multi-user.target
- Enable the service at boot by typing
systemctl enable nw
- create a script under root directory.
- - Install Tuned service that optimizes the performance of the system and sets the workload profile to latency-performance to optimize performance as well as the latency.
apt-get install tuned
tuned-adm profile latency-performance
This service is not activated at boot time. In order to activate it, edit the file /usr/lib/systemd/system/tuned.service and add the following lines in Service section:
Restart=always
User=root
3.3 Amarisoft Release Install
The standard x86 install procedure is detailed in:
https://tech-academy.amarisoft.com/Install_Callbox.html
There are 2 major differences in the install phase compared to x86:
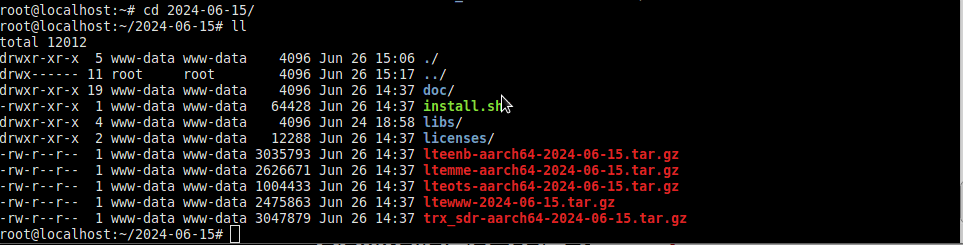
- - Once you have uncompressed the tarball, you should be seeing aarch64 prefix as shown in the following. If there is no component with aarch64, please contact the support team to add Arm builds in your release.
- - After running the
install.shscript, some errors occur during the SDR driver install phase as can be seen below../install.sh Ubuntu 20 found ************************************************************* * Installing Amarisoft LTE 2024-06-15 (2024-06-26 15:05:43) * ************************************************************* 1) Configuration You can exit install script during this step, nothing will be changed until next step * Do you want to install LTE automatic service ? Package screen may be installed. [Yn] y - Do you want to enable LTE automatic service ? [Yn] y - Do you want to use NAT for IPv4 ? [Yn] y - Do you want to use IPv6 ? [Yn] n * Do you want to install EPC ? Package lksctp-tools may be installed. [Yn] y - Do you want to install IMS ? [Yn] y * Do you want to install eNB ? Package lksctp-tools may be installed. [Yn] y - Select TRX radio frontend: 1) sdr (default) > 1 (sdr) - Do you want to use MIMO ? [Yn] y * Do you want to install Web interface ? Package apache php may be installed. and enable your web server. [Yn] y 2) Install LTE automatic service 3) Install Web interface 4) Install TRX sdr 5) Install EPC Configure IMS 6) Install eNB Use TRX sdr [TRX] Ubuntu 20 found [TRX] N: Unable to locate package linux-headers-5.10.35-00078-g2d74411d5cf2 [TRX] N: Couldn't find any package by glob 'linux-headers-5.10.35-00078-g2d74411d5cf2' [TRX] N: Couldn't find any package by regex 'linux-headers-5.10.35-00078-g2d74411d5cf2' [TRX] Install package linux-headers-5.10.35-00078-g2d74411d5cf2 (this may take a while)... [TRX] Can't install package linux-headers-5.10.35-00078-g2d74411d5cf2 [TRX] make[1]: *** No rule to make target 'modules'. Stop. [TRX] make: *** [Makefile:14: sdr.ko] Error 2 [TRX] Error while compiling kernel driver. [TRX] Your kernel may not be up to date. [TRX] Reboot your system and process install again. TRX sdr driver installation has failed 7) Finalize LTE automatic service Start service ********************************** * 1 error(s) during installation * **********************************This is due to the fact that the SDR driver should be recompiled with the right kernel headers. Next section explains how to compile the SDR driver manually in order to finalize the installation of the Amarisoft software release.
3.4 Manual Compile of the SDR driver
The uboot image installed in the Honeycomb platform does not include kernel files by default. Compiling the SDR driver kernel module, however, requires these files to be present. So first step would be to download the kernel header files.
The kernel header files are located at the same directory as the Honeyomb image.
Assuming the image directory is located at https://images.solid-run.com/LX2k/lx2160a_build/20240530-3fbd680, you can use wget command to download the headers directly on the platform.
cd /root
wget https://images.solid-run.com/LX2k/lx2160a_build/20240530-3fbd680/linux-headers-3fbd680.tar.xz
mkdir linux-headers-x86
tar -C linux-headers-x86 -xf linux-headers-3fbd680.tar.xz
Solidrun provides the kernel headers package including the binary programs built for x86_64. For a native build on an Arm platform, QEMU user-mode emulation packages must be installed and configured, to allow transparent execution of these programs as below:
- - Install QEMU
apt-get install qemu-user-binfmt - - Install amd64 library dependencies:
apt-get install libc6-amd64-cross
ln -sv /lib /lib64
ln -sv /usr/x86_64-linux-gnu/lib/ld-linux-x86-64.so.2 /lib/ld-linux-x86-64.so.2
ln -sv /usr/x86_64-linux-gnu/lib /usr/lib/x86_64-linux-gnu
- - Install native toolchain
apt-get install build-essential ca-certificates
Now that everything is in place, we can compile the SDR kernel driver by patching the Makefile as in the following:
- - Edit the Makefile
cd /root/trx_sdr/kernel
nano Makefile - - Change the KERNEL_PATH variable as follows:
KERNEL_PATH:=/root/linux-headers-x86 - - Add CROSS_COMPILE=aarch64-linux-gnu- ARCH=arm64 to the make command as follows:
make -C $(KERNEL_PATH) CFLAGS_MODULE='-DCONFIG_VERSION=\"$(CONFIG_VERSION)\"' CROSS_COMPILE=aarch64-linux-gnu- ARCH=arm64 M=$(shell pwd) modules - - Save the Makefile and compile the driver as follows:
make clean
make - - Load the SDR driver.
./root/trx_sdr/kernel/init.sh - - Create a
.amarisoftdirectory under/root, download and copy the license file inside.mkdir /root/.amarisoft - - The last step is to restart the service for the changes to take effect.
service lte restart
4 Order Information
- Following items could be purchased directly from Solidrun.
- - SolidRun Honeycomb board.
https://shop.solid-run.com/product/SRLX216S00D00GE064H09CH/ - - 32 GB of RAM.
https://shop.solid-run.com/product/SO-DIMM216/ - - 16 GB Micro SD.
https://shop.solid-run.com/product/MSD016B/
- - SolidRun Honeycomb board.
- Following items could be purchased directly from Amarisoft
- - Software binary license for RAN and CN. We suggest to go with AMARI NW 2000.
- - AMARI PCIe SDR100 card
- - Antennas for over the air testing.
- Following items could be purchased directly from online shops such as Amazon.
- - Micro USB to USB cable.
https://www.amazon.fr/dp/B0C8FZZB83?ref=ppx_yo2ov_dt_b_product_details&th=1 - - PicoPSU Power Supply ATX 150 W 12 V DC-DC.
https://www.amazon.fr/dp/B0045IXKTQ?psc=1&ref=ppx_yo2ov_dt_b_product_details - - LEICKE AC/DC Adapter 150W 12V 12.5A to go with Pico PSU Power supply.
https://www.amazon.fr/dp/B00YXXAG7C?psc=1&ref=ppx_yo2ov_dt_b_product_details
- - Micro USB to USB cable.
5 Additional Information
This document is copyright (C) 2012-2026 Amarisoft. Its redistribution without authorization is prohibited.
This document is available without any express or implied warranty and is subject to change without notice. In no event will Amarisoft be held liable for any damages arising from the use of this document.
For any technical issue, please raise a ticket from our support site at https://support.amarisoft.com/.
To learn more about our technology and solutions, e-mail us at customer@amarisoft.com or visit https://www.amarisoft.com.