Installation - PJSIP
The purpose of this tutorial is to show how to install PJSIP. PJSIP is an open source SIP client that can be installed on UEsim and function as a sip client on Amarisoft UEsim.
Table of Contents
Introduction
PJSIP is a highly portable and open source multimedia communication library that implements standard-based protocols such as SIP (Session Initiation Protocol), SDP (Session Description Protocol), RTP (Real-time Transport Protocol), STUN, TURN, and ICE. It is widely recognized for its small footprint, high performance, and rich features that enable the development of SIP-based real-time communication applications, including softphones, VoIP clients, and embedded communications systems. Architecturally, PJSIP is written in C and designed as a modular, layered stack, supporting a variety of media transports and codecs, and providing APIs for both signaling and media. In the context of mobile network testing, PJSIP can be installed on Amarisoft UEsim—a powerful user equipment simulator used in LTE and 5G environments—to function as a SIP client, enabling SIP signaling and VoIP call simulation in end-to-end network validation scenarios. While PJSIP is not a native Amarisoft product and thus not supported by Amarisoft, its integration with UEsim extends the testing capabilities of the platform. This tutorial provides a step-by-step guide to installing PJSIP on UEsim, considering the variability in dependencies and the nuances of source code compilation. It is important to note that installation challenges are often dependency-related and may require on-the-fly troubleshooting; leveraging AI-based assistance like ChatGPT is recommended for addressing such issues.
-
Context of the Technology
- PJSIP: An open source SIP stack and media communication library, supporting real-time voice, video, and instant messaging over IP networks.
- Amarisoft UEsim: A user equipment simulator designed for LTE and 5G network testing, supporting various protocol stacks and customizable application integration.
- Integration: Deploying PJSIP on UEsim allows emulation of SIP-based clients in simulated radio environments, facilitating advanced network validation.
-
Relevance and Importance of the Tutorial
- Enables comprehensive testing of SIP/VoIP call flows in simulated mobile environments.
- Expands UEsim’s versatility by adding SIP client capability for real-world application emulation.
- Addresses the lack of native SIP support in Amarisoft UEsim by leveraging open source solutions.
- Provides practical guidance on overcoming common installation challenges, particularly dependency resolution.
-
Learning Outcomes
- Understand the architecture and key components of PJSIP and its integration with UEsim.
- Gain hands-on experience in compiling and installing PJSIP from source on a Linux-based simulator.
- Learn to identify and resolve common dependency and build issues during installation.
- Acquire the ability to configure and validate a functional SIP client within a simulated network context.
-
Prerequisite Knowledge and Skills
- Familiarity with Linux command line usage and basic package management tools.
- Understanding of SIP protocol basics and VoIP communication principles.
- Experience with compiling software from source code (using make, gcc, and related build tools).
- Basic knowledge of Amarisoft UEsim operations and its software environment.
-
Scope and Disclaimer
- This tutorial is provided as an example procedure; actual steps may vary depending on system configurations and PJSIP release versions.
- Amarisoft does not officially support PJSIP; users should consult community forums or AI-based assistants for troubleshooting.
Summary of the Tutorial
This tutorial outlines the step-by-step procedures for installing and verifying the AMR codec and PJSIP application in a dedicated directory. The process includes package acquisition, compilation, installation, and verification steps for each component. Below is a summarized breakdown of the test procedures and methodologies described:
-
Directory Preparation
- Create a new, distinctive directory for the installation (e.g., /root/siptrunk).
- This directory will be referred to as the installation directory throughout the tutorial.
-
AMR Codec Installation and Verification
-
opencore-amr installation:
- Download the opencore-amr package from the specified SourceForge link.
- Place the package in the installation directory.
- Uncompress the tarball and verify successful extraction.
- Navigate to the extracted directory and run ./configure --prefix=/root/siptrunk.
- Build and install using make && make install.
- Check the installation directory for new include and lib directories to confirm successful installation.
-
vo-amrwbenc installation:
- Download the vo-amrwbenc package from the specified SourceForge link.
- Place the package in the installation directory and uncompress it.
- Navigate to the extracted directory and configure it using ./configure --prefix=/root/siptrunk.
- Build and install with make && make install.
- Optionally, verify the presence of expected directories and files under /root/siptrunk/include.
-
opencore-amr installation:
-
PJSIP Application Installation and Verification
- Download the PJSIP package from the official website and place it in the installation directory.
- Uncompress the package and navigate to the extracted directory.
- Configure the build environment with the command ./configure --with-opencore-amr=/root/siptrunk.
- Build the project using make dep && make clean && make.
- After successful build, navigate to the pjsip-apps/bin directory to locate the executables.
- Verify the executable (e.g., ./pjsua-x86-64-unknown-linux-gnu) by running it and confirming the expected execution screen is displayed.
-
AMR Codec Integration Test in PJSIP
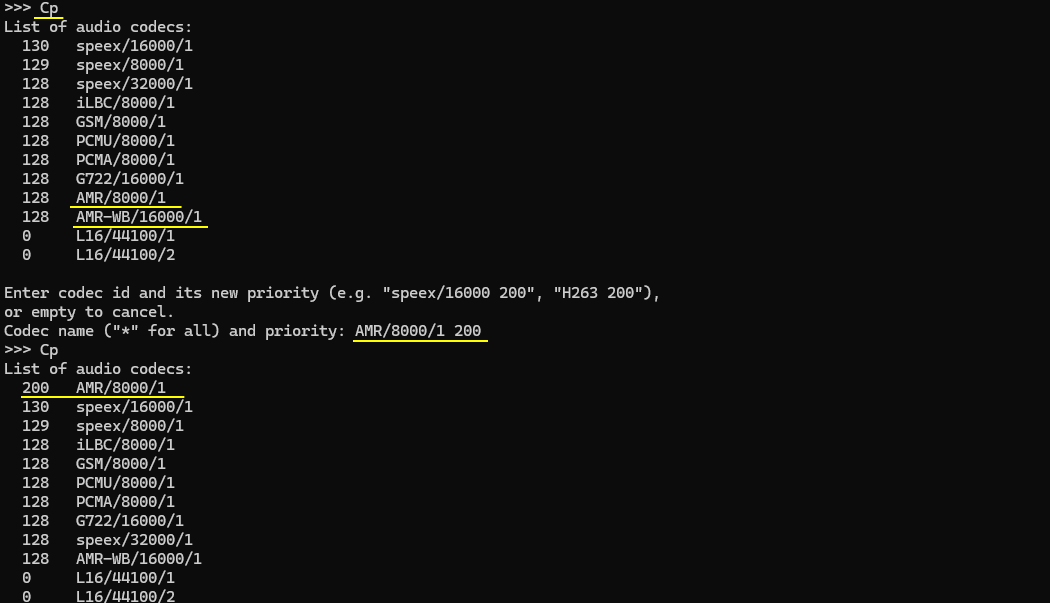
- Check AMR codec installation and association with PJSIP using the Cp (Codec priorities) command.
- Verify that the AMR codec appears in the codec list and adjust codec priorities if necessary using the Cp command.
The tutorial emphasizes manual verification steps after each major installation phase, with particular attention to checking directory structures and executable presence as indicators of successful installation.
Create a directory
You can install the program in any existing directory, but I would recommend you to install it in a new distinctive directory.
You can specify anything you like as the name of the directory. In this tutorial, I created the directory named siptrunk under /root directory. (

Installation of AMR codec
We installed two packages related to AMR for PJSIP here. (
opencore-amr installation
Download the package from https://sourceforge.net/projects/opencore-amr/files/opencore-amr/ and put it in the installation package (/root/siptrunk in this tutorial). You may refer to https://trac.pjsip.org/repos/wiki/Using-OpenCORE-AMR-NB-WB-Codec for the document.

Uncompress the tarball and confirm the tarball is properly uncompressed.

Then move to the directory by uncompression (opencore-amr-0.1.6 in case of this tutorial) and run ./configure --prefix=/root/siptrunk
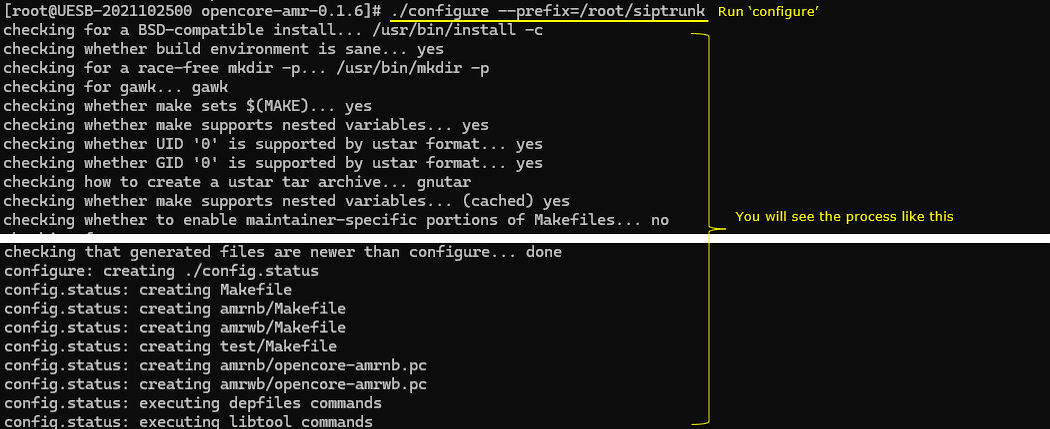
Then build the code and install with command 'make && make install'. (
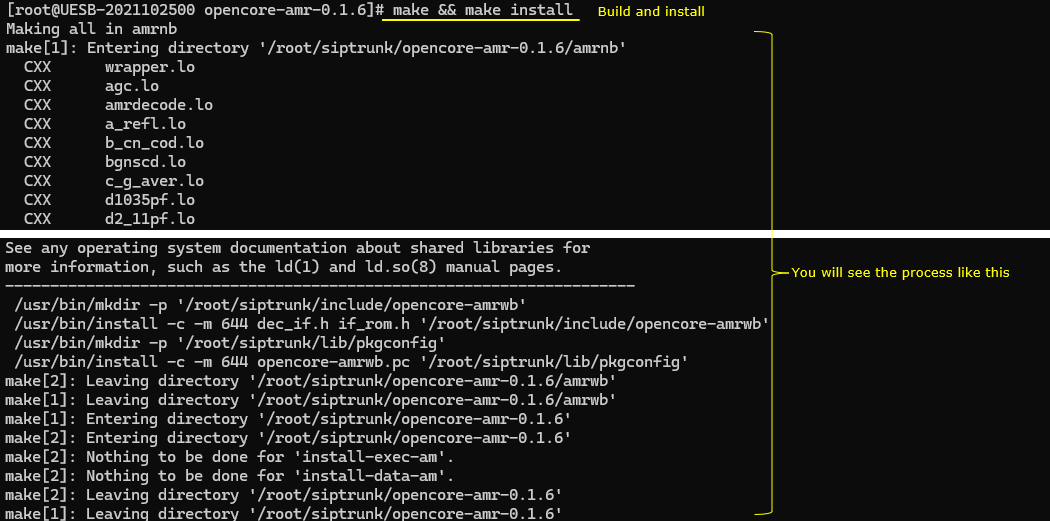
You sould see some new files create during building and installation if the process went through properly.
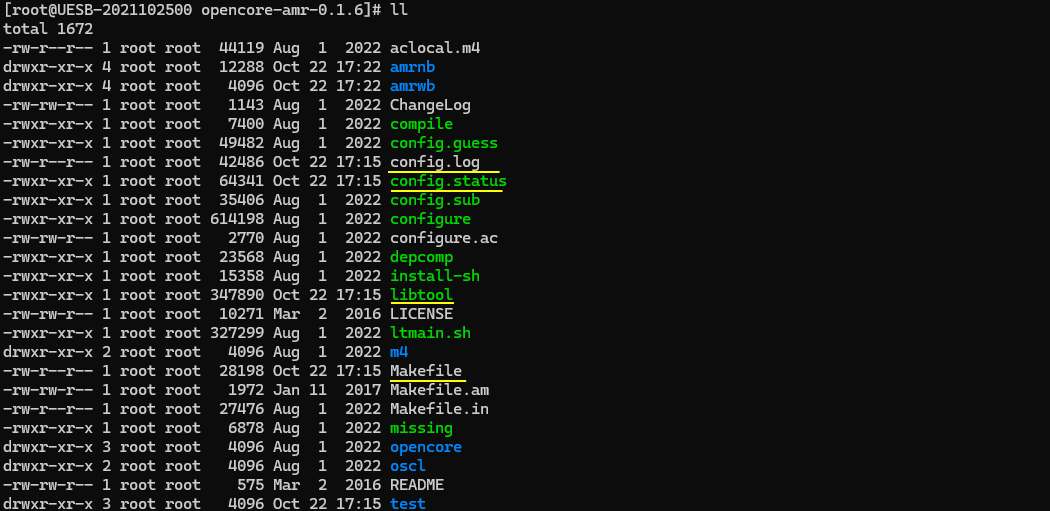
If you move to the installation directory (/root/siptrunk in this ase), you will see that include and lib directory is created as well.

vo-amrwbenc installation
dowload vo-amrwbenc from https://sourceforge.net/projects/opencore-amr/files/vo-amrwbenc/ and place it in the installation directory (/root/siptrunk in this case)

Uncompress the tarball.

Move to the uncompressed directory (vo-amrwbench-0.1.3 in this case)
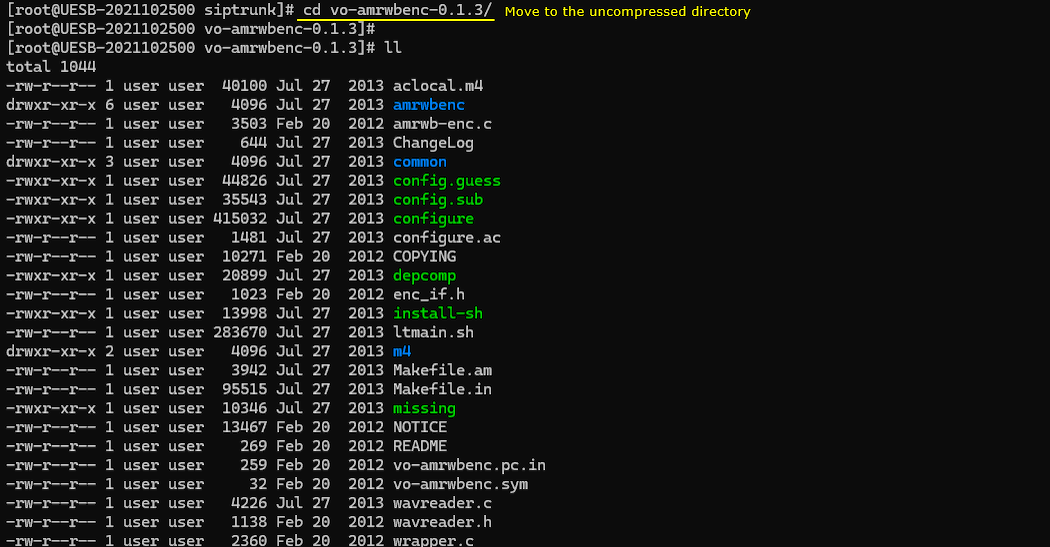
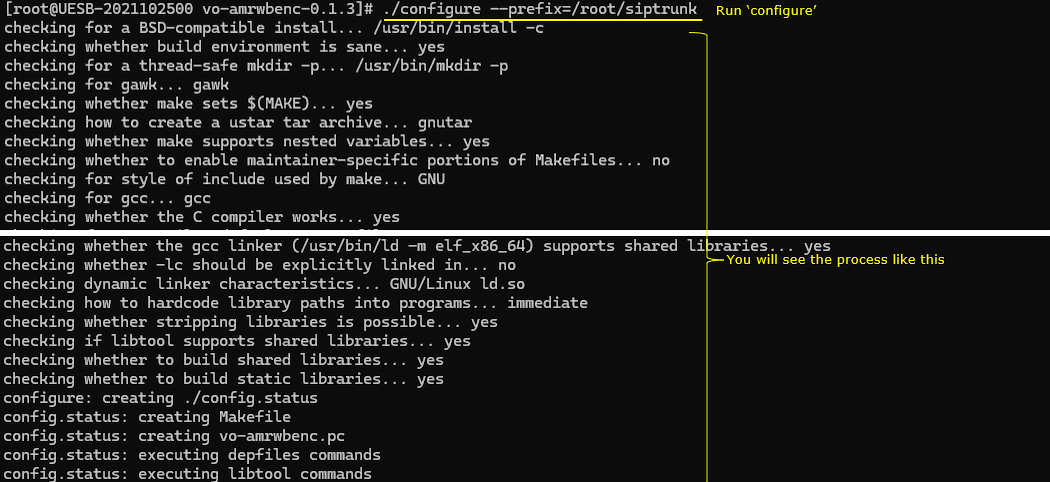
Then run the configure program (./configure --prefix=/root/siptrunk)
build and install (make && make install) (
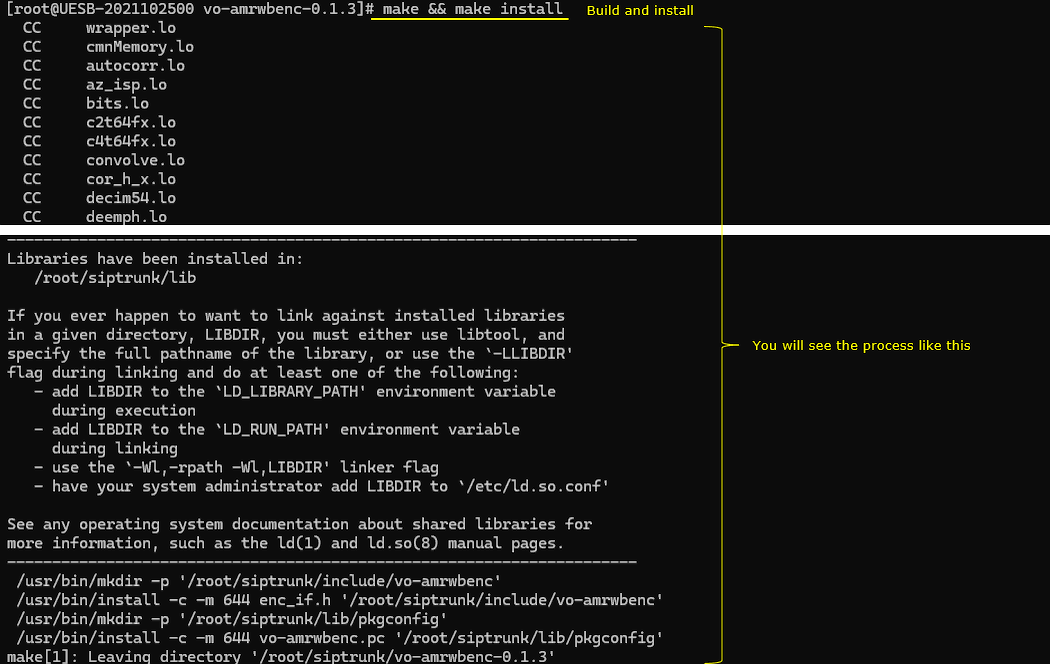
(Optional) move to the installation directory (/root/siptrunk in this case) and you will see the directories and files as shown below.

Check out the files in the /root/siptrunk/include an check if you have the subdirectories as shown below.

Installation of PJSIP
Now let's install the application PJSIP
Download the pjsip here https://www.pjsip.org/download.htm (
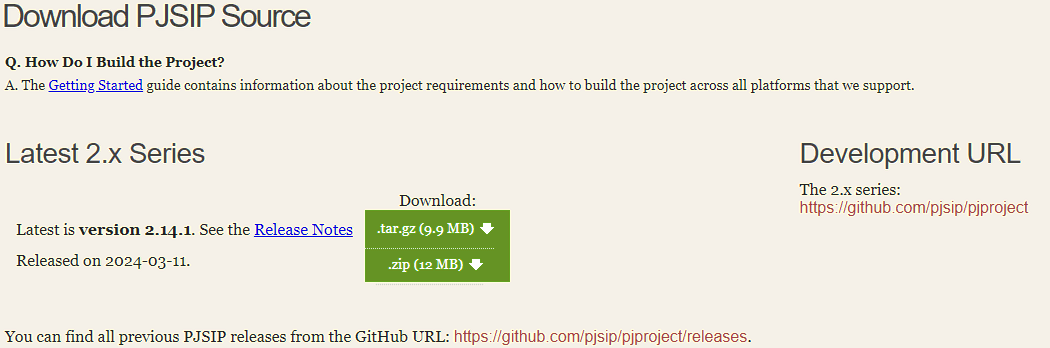
Place the downloaded file in the installation directory (/root/siptrunk in this case).

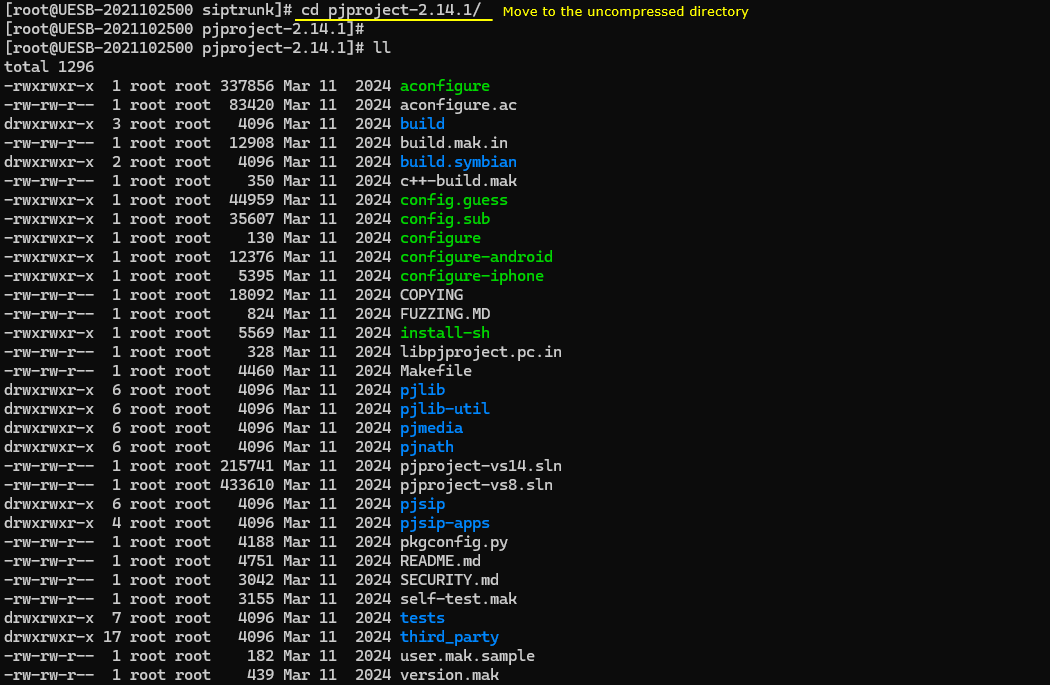
Uncompress the downloaded file.
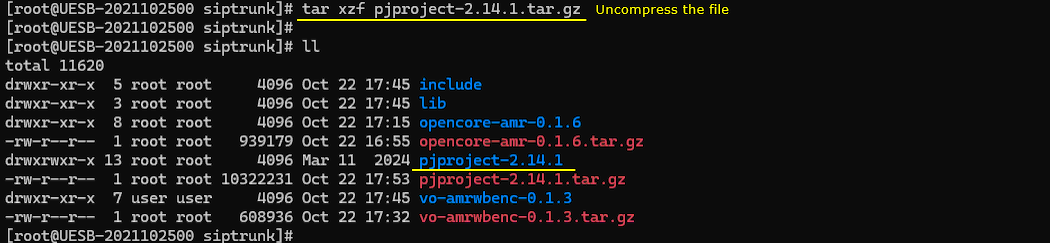
Go to the unzipped directory and you will see the files and subdirectories as shown below.
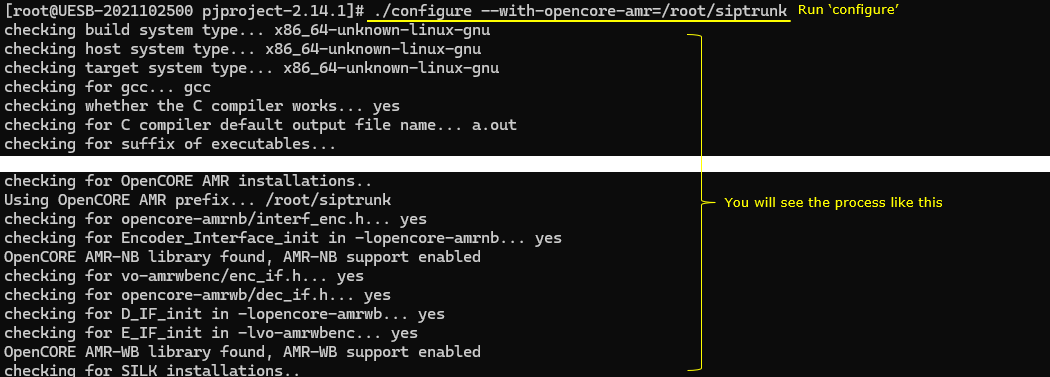
Now run the configure program as shown below (./configure --with-opencore-amr=/root/siptrunk')
build the project with the command 'make dep && make clean && make'(
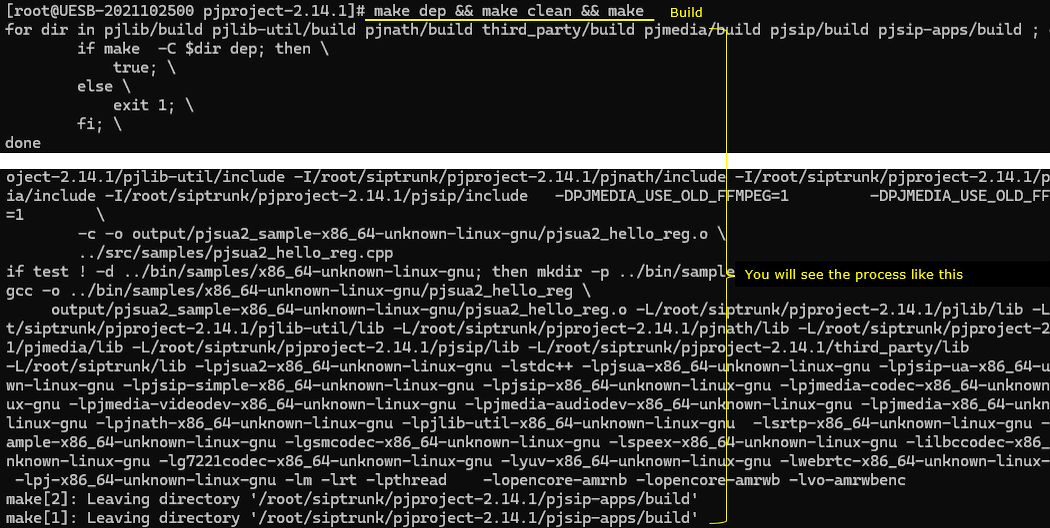
If the build process is properly done, you can move to the built directory (/root/siptrunk/pjproject-2.14.1/pjsip-apps/bin directory in this case). You would see the executable files as shown below.

Just to make it sure that the executable ./pjsua-x86-64-unknown-linux-gnu'.
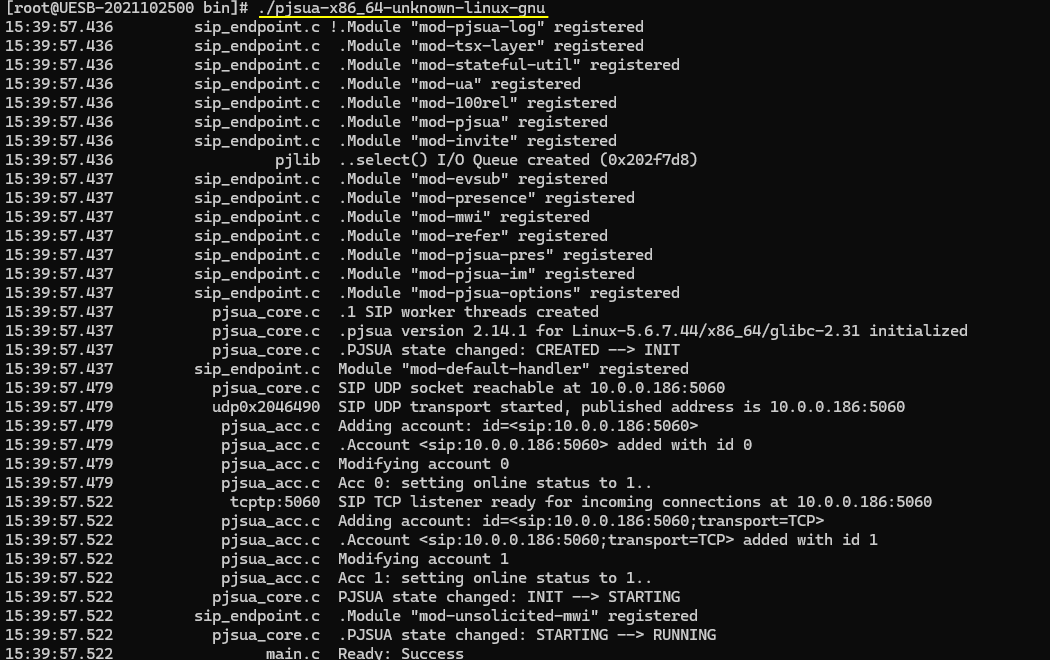
If the executable is properly built, you will get the execution screen as shown below.
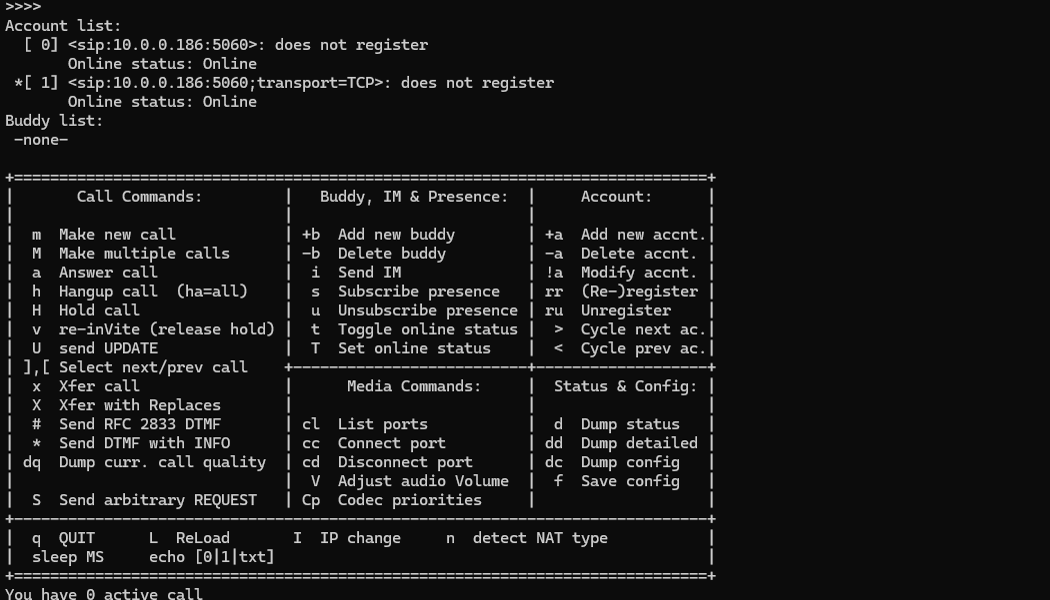
Now you can check if AMR codec is properly installed and associated with pjsip with Cp (Codec priorities) command as shown below. (