Installation - Callbox/UEsim trx over ip
The purpose of this tutorial is to show you how to install Callbox and UEsim software on a single PC with trx ip mode. This mode allows you to use Callbox and UEsim on a single PC without using any SDR card. In this mode, Callbox and UEsim communicate over IP instead of SDR cards.
Table of Contents
- Installation - Callbox/UEsim trx over ip
Introduction
Callbox and UEsim are specialized software solutions developed by Amarisoft for wireless network simulation and testing, widely used in research, development, and quality assurance environments within the telecommunications sector. Callbox functions as a complete cellular network emulator, capable of simulating the behavior of 2G/3G/4G/5G base stations (eNodeB/gNodeB) and core networks, while UEsim acts as a configurable user equipment (UE) simulator, emulating thousands of devices to test network performance, stability, and compliance. Traditionally, these solutions require Software Defined Radio (SDR) hardware cards to facilitate radio frequency signal transmission and reception. However, with the advent of trx IP mode, it is now possible to run both Callbox and UEsim entirely on a single PC, leveraging IP-based communication for baseband signal transport. This architecture eliminates the need for physical SDR hardware, enabling a more flexible, cost-effective, and scalable testing environment for protocol validation, performance benchmarking, and end-to-end network emulation. The use of trx IP mode is particularly significant for development labs, continuous integration pipelines, and virtualized testing environments, as it accelerates deployment and simplifies infrastructure requirements. It is important to note that operating in trx IP mode may necessitate a dedicated license from Amarisoft, and the installation process closely mirrors standard procedures for both Callbox and UEsim, with only a few option-specific adjustments during setup. This tutorial provides a step-by-step guide on how to install and configure Callbox and UEsim on a single PC in trx IP mode, ensuring seamless emulation and communication without the need for SDR cards.
-
Context and Background
- Callbox is a software-based network emulator that replicates the functionalities of real cellular networks, supporting a range of wireless standards including LTE and 5G NR.
- UEsim simulates multiple user devices, enabling comprehensive testing of network infrastructure under various load and mobility scenarios.
- Trx IP Mode is an operational mode where Callbox and UEsim exchange baseband signals over IP networking, bypassing the need for SDR hardware and facilitating virtualized test setups.
- Both software tools are commonly used for functional validation, regression testing, network optimization, and research.
-
Relevance and Importance of this Tutorial
- Enables organizations to deploy scalable, hardware-independent network testing environments.
- Reduces infrastructure costs and complexity by utilizing a single PC setup.
- Accelerates development and testing cycles by simplifying installation and configuration.
- Provides step-by-step guidance tailored for users transitioning from SDR-based setups to IP-based emulation.
-
What Learners Will Gain
- Understanding of the architectural differences between SDR-based and IP-based setups for Callbox and UEsim.
- Hands-on experience installing and configuring both Callbox and UEsim on a single PC using trx IP mode.
- Knowledge of best practices for license management and configuration adjustments specific to trx IP mode.
- Ability to troubleshoot common issues encountered during installation and initial setup.
-
Prerequisite Knowledge and Skills
- Familiarity with basic Linux system administration and command-line operations.
- Understanding of IP networking concepts and local network configuration.
- Prior experience with Amarisoft software products (Callbox/UEsim) is helpful but not mandatory.
- Awareness that a specific license for trx IP mode may be required and should be obtained from Amarisoft prior to installation.
Summary of the Tutorial
This tutorial provides a detailed procedure for installing the Amarisoft LTE software package with a focus on utilizing the TRX IP functionality. The following summarizes the key test and verification procedures described:
-
Download and Preparation:
- Download the installation tarball from the Amarisoft Extranet account.
- Place the downloaded package in any suitable directory (e.g., /root or /tmp, noting that /tmp is cleared on power cycles).
-
Installation Procedure:
- Untar the downloaded package to extract the installation directory.
- Navigate to the untarred directory and list its files to locate the install.sh script and associated installation files.
- Execute
./install.shto start the installation process. -
During installation, follow interactive prompts to:
- Install LTE automatic service and related packages (e.g., screen).
- Migrate configuration files from the current running version where prompted.
- Enable options such as NAT for IPv4/IPv6, hyperthreading control, EPC, IMS, eNB, UE simulator, and web interface as required.
- Select TRX radio frontend as "ip" for both eNB/gNB and UE simulator components.
- Choose other optional components (e.g., N3IWF, Spectrum viewer, LTE probe, LTE scanner, MBMS gateway, license server, LTE monitoring) as needed.
- Determine whether to start services automatically after installation.
- Monitor the import and migration of configuration files, noting any warnings about conflicts or modifications.
- On completion, confirm successful installation as indicated by the script.
-
Directory and Configuration Verification:
- Check the installation directory structure (e.g., /root/enb, /root/mme, /root/ue, /root/ots, /root/trx_ip).
- Verify that the rf_driver directory in both enb/config and ue/config is mapped to the ip directory, confirming TRX IP mode configuration.
- Examine the config.cfg files within each component to ensure correct driver mapping (detailed analysis of these files is reserved for other tutorials).
-
OTS Configuration Reference:
- Review the ots configuration file for general error handling, logging, component mapping, and system configuration parameters.
- Understand component registration for MME, IMS, ENB, and UE within the OTS configuration, ensuring that all necessary services are properly listed and configured for startup.
-
Software Operation Verification:
- After installation, execute
service lte restartto restart the LTE service. - Run
screen -rto attach to the service screen and confirm that all components are running without errors.
- After installation, execute
This systematic procedure ensures the correct installation and configuration of Amarisoft LTE components with TRX IP mode, and includes verification steps to validate both the file structure and the operational status of the installed software.
Download the New Release
The trx ip functionality does not require any special software, it is included in the regular installation package. Soyou can download the installation package (Tarball) from Amarisoft Extranet account as you download your regular installation packageas shown below.

You can place the downloaded package anywhere you like. In this tutorial, I put it in /root directory as shown below.

Install
Untar the package as shown below
![]()
You will get the untared directory as shown below. You will see all the software packages for installation in this directory.

Go to the untarred directory and list the files in it. You will see the installation shell program and other files required for installation (In this specific case shown above, go do the directory '2021-11-19' to get the contents as shown below.)

Go through the installation procedure as shown below.
|
[root@jaeku-laptop 2024-03-21]# ./install.sh Fedora 34 found ************************************************************* * Installing Amarisoft LTE 2024-03-21 (2024-03-31 17:05:14) * ************************************************************* 1) Configuration You can exit install script during this step, nothing will be changed until next step * Do you want to install LTE automatic service ? Package screen may be installed. [Yn] - Do you want to migrate your config files from current running version ? [Yn] - Do you want to enable LTE automatic service ? [Yn] - Do you want to use NAT for IPv4 ? [Yn] - Do you want to use IPv6 ? [Yn] - Do you want to use NAT for IPv6 ? [Yn] - Do you want to turn hyperthreading off (we strongly recommand it) ? [Yn] * Do you want to install EPC ? Package lksctp-tools may be installed. [Yn] - Do you want to migrate your config files from current running version ? [Yn] - Do you want to install IMS ? [Yn] * Do you want to install eNB ? Package lksctp-tools may be installed. [Yn] - Do you want to migrate your config files from current running version ? [Yn] - Select TRX radio frontend: 1) ip 2) sdr 3) n2x0 4) b2x0 5) x3x0 6) n3x0 7) limeSDR 8) limeMini 9) s72 a) example > - Do you want to use MIMO ? [Yn] * Do you want to install N3IWF ? Package lksctp-tools may be installed. [yN] * Do you want to install UE simulator ? [Yn] - Do you want to migrate your config files from current running version ? [Yn] - Select TRX radio frontend: 1) ip 2) sdr 3) n2x0 4) b2x0 5) x3x0 6) n3x0 7) limeSDR 8) limeMini 9) s72 a) example > - Do you want to start automatically ? [yN] * Do you want to install Spectrum viewer ? [yN] * Do you want to install LTE probe ? [yN] * Do you want to install LTE scanner ? [yN] * Do you want to install MBMS gateway ? Package lksctp-tools may be installed. [yN] * Do you want to install Web interface ? Package apache php may be installed. and enable your web server. [Yn] * Do you want to install license server ? [yN] * Do you want to install LTE monitoring ? Package nodejs ssmtp may be installed. [yN] 2) Install LTE automatic service 3) Install Web interface 4) Install TRX ip 5) Install EPC Configure IMS Migrate configuration files 3 config file(s) imported 6) Install eNB Use TRX ip Migrate configuration files 11 config file(s) imported 7) Install UE simulator Use TRX ip Migrate configuration files 4 config file(s) imported 8) Finalize LTE automatic service Migrate configuration files Warning, reference config file ots.default.cfg was modified It has been imported as ots.default.cfg.bak, you may report your changes manually Warning, ots.default.cfg.bak config file conflicts with new release It won't be imported, you may report your changes manually No config file(s) imported Start service *************************** * Installation successful * *************************** |
Directory Structure of Installed Release
This is just to check up the result of installation. If you check up the file list in the installation directory (/root) you can see enb/mme/ue/ots/trx_ip directories.

If you go into /root/enb/config, you would see rf_driver directory is mapped to the directory ip.

If you go into the directory 'ip', there is a config.cfg file that is mapping the rf driver to ip. (The details of the config.cfg will be explained in another tutorial)

If you go into /root/ue, you would see rf_driver directory is mapped to the directory ip.

If you go into /root/ue/config, there is a config.cfg file that is mapping the rf driver to ip. (The details of the config.cfg will be explained in another tutorial)

Contents of ots Config
This is just for a reference. Usually you may not need to check on this. You may want to check on this only when screen mode (i.e, the user interface with 'screen -r') does not behave as expected.

The contents of the file is as follows.
|
# General ERROR_DELAY="5" # Component restart time in case of error (in seconds) #AMARISOFT_PATH="" # Change license file location #HOSTNAME="My name" # Use this to override system hostname (| are forbidden) # Logs LOG_FILE="ots.log" LOG_FILE_SIZE="1M" # Service log file size threshold for rotation LOG_SIZE="250M" # Components log file size threshold for rotation LOG_PATH="/var/log/lte/" # Log rotation target path LOG_PERSISTENT_SIZE="5G" # Maximum size of logs to store in LOG_PATH (if no unit KBytes assumed) LOG_PERSISTENT_COUNT="2000" # Maximum number of log file to keep in LOG_PATH LOG_GZIP="0" # Set to positive value to compress logs in LOG_PATH LOG_POLL_DELAY="10" LOG_BACKUP_ON_STOP="y" # Set it to n to avoid log backup (to LOG_PATH) on component stop # Component configuration # <COMP> is component ID and must be unique # # <COMP>_TYPE: component type (LICENSE MME ENB IMS MBMSGW UE...) # <COMP>_TITLE: display name # <COMP>_PATH: Component path. Set it to empty string to disable component # <COMP>_INIT: arguments for lte_init.sh script # <COMP>_WIN: Component screen window # (must be unique) # <COMP>_CONFIG_FILE: config file used by component # <COMP>_OUTPUT_FILE: define it to dump stdout/stderr to a file # <COMP>_AUTOSTART: defines if component must be started by service (default is y) # <COMP>_SCRIPT: defines shell script that will be executed on each component state change # Arguments are <COMP> <STATE> [<ERROR>] where state can be: # - starting: before executing component binary # - started: after component binary has started # - error: when any error occurred (In this case the third argument will be filed with error message) # - stop: after successful component stop # This can be used to perform any action before component start by using the state starting # Note that the script is executed synchronously and may delay or block component startup # <COMP>_START_DELAY: time to wait in seconds before starting component # List of components to start COMPONENTS="" # Start of section generated by installer # Wed Apr 3 07:06:32 AM UTC 2024 # LTE automatic service config OTS_PATH="/root/ots" #OTS_AUTOSTART="y" #OTS_ADDRESS="" # Set it to force WS address of components from GUI WWW_PATH="/var/www/html/lte/" # EPC config COMPONENTS+=" MME" MME_TYPE="MME" MME_WIN="0" MME_PATH="/root/mme" #MME_AUTOSTART="y" MME_INIT=" -6" MME_CONFIG_FILE="config/mme.cfg" # IMS config COMPONENTS+=" IMS" IMS_TYPE="IMS" IMS_WIN="3" IMS_PATH="/root/mme" #IMS_AUTOSTART="y" IMS_DEP="MME" IMS_CONFIG_FILE="config/ims.cfg" # eNB config COMPONENTS+=" ENB" ENB_TYPE="ENB" ENB_WIN="1" ENB_PATH="/root/enb" #ENB_AUTOSTART="y" ENB_INIT="" ENB_RRH_CHECK="config/rf_driver/rrh_check.sh" ENB_CONFIG_FILE="config/enb.cfg" # UE simulator config COMPONENTS+=" UE" UE_TYPE="UE" UE_WIN="2" UE_PATH="/root/ue" UE_AUTOSTART="y" UE_INIT="" UE_RRH_CHECK="config/rf_driver/rrh_check.sh" UE_SCRIPT="config/ots-script.sh" UE_CONFIG_FILE="config/ue.cfg" # System configuration HT_STATE="off" # End of section generated by installer |
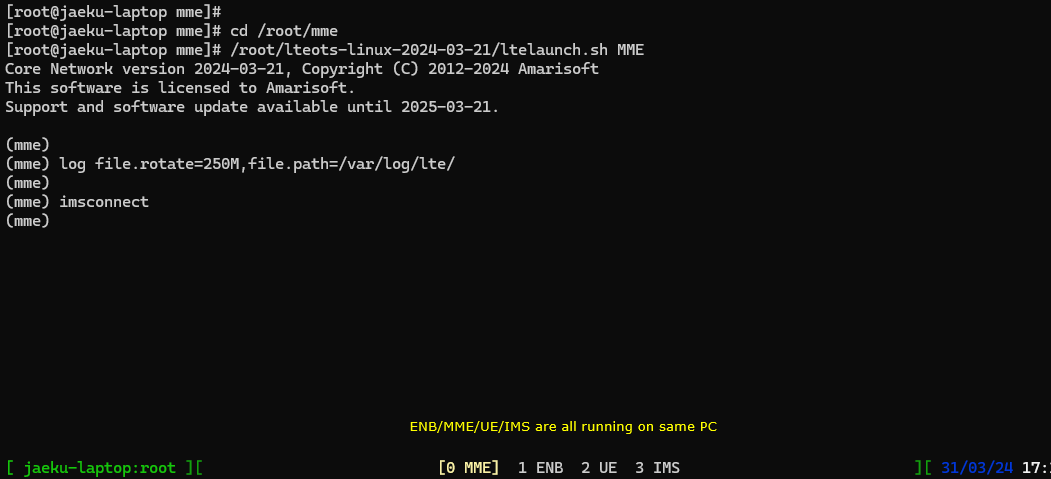
Checkup Software Run
Once every check up is done, run 'service lte restart' and 'screen -r' just to make it sure the installed software is running without any error.